How to Complete Pi Network Mainnet Checklist Step 7
Pi Invitation Code: iamhassaan60
Share this Blog
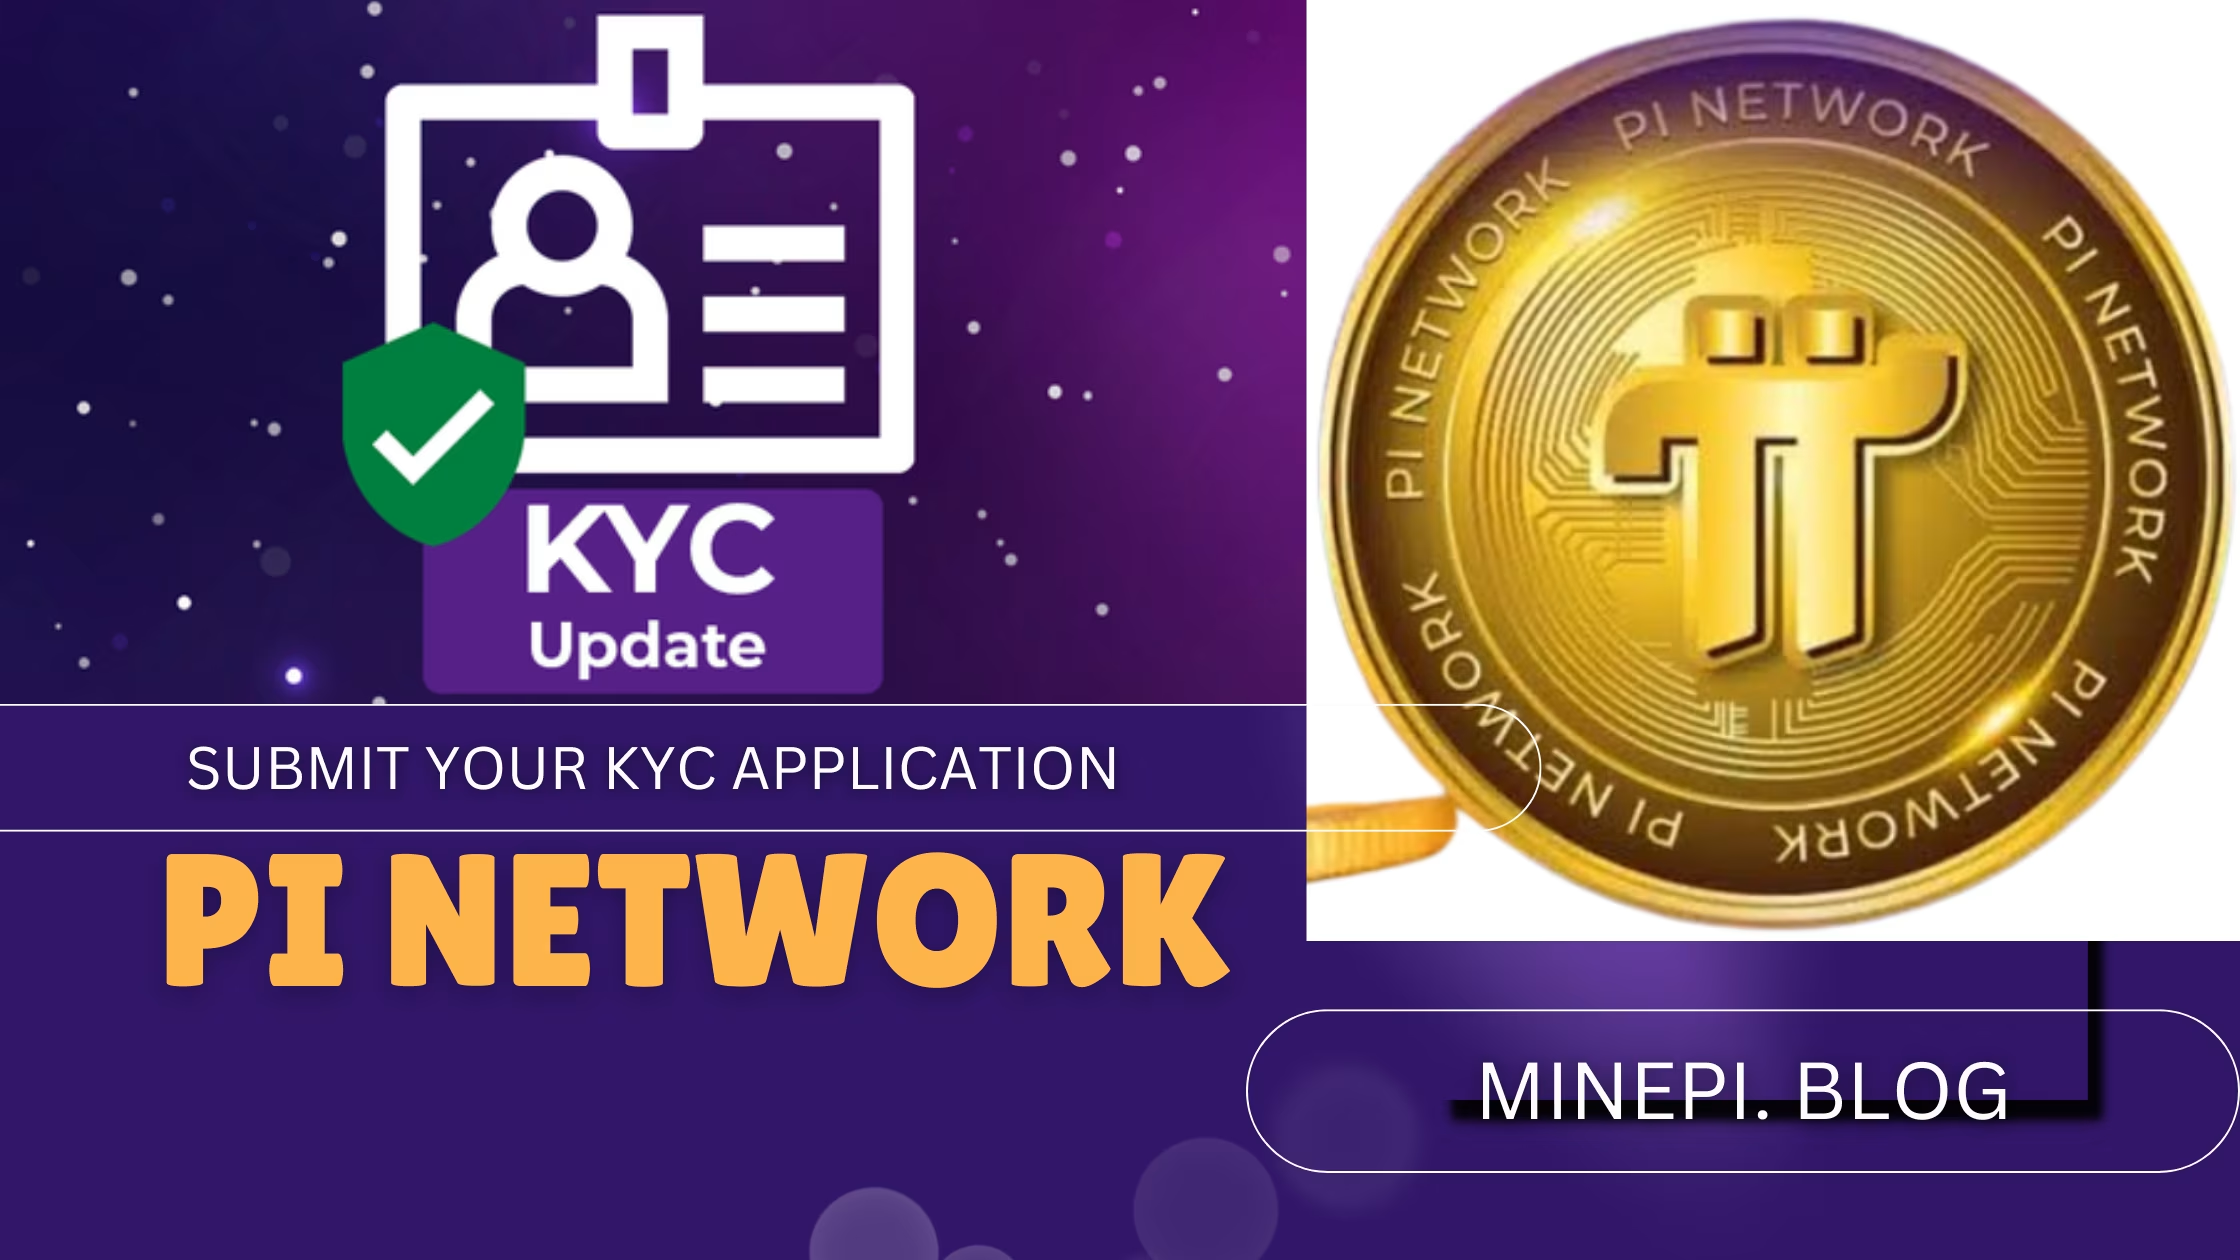
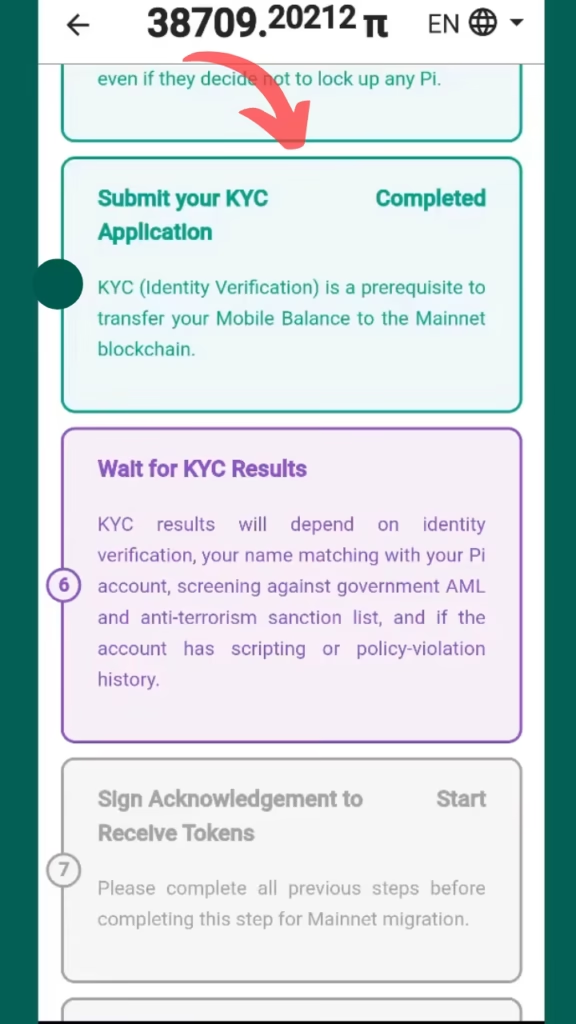
In this blog, I’ll guide you through completing Step 7 of the Pi Network Mainnet Checklist. This step is super important because it involves submitting your KYC (Know Your Customer) application.
Why is Step 7 Important?
Submitting your KYC application is essential for verifying your identity. This step ensures you follow the rules and regulations required to use Pi cryptocurrency. Without completing this step, your Pi coins cannot be validated or used for transactions on the Pi Network’s blockchain.
What is KYC in the Pi Network?
KYC, or Know Your Customer, is a process where you share documents and information to prove your identity. Here’s why it matters:
- It prevents fake accounts and fraudulent activities.
- It ensures Pi Network follows global financial laws.
- It allows only real users to claim and use Pi coins.
By completing KYC, you make your account secure and unlock the full benefits of your Pi coins. In the next steps, I’ll explain how to submit your KYC application and complete Step 7 successfully. Stay tuned!
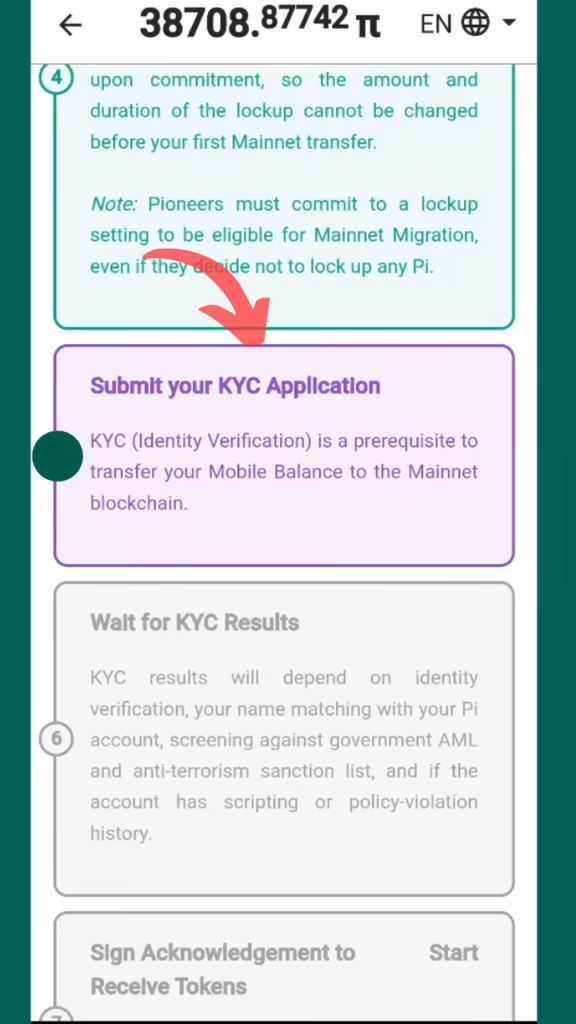
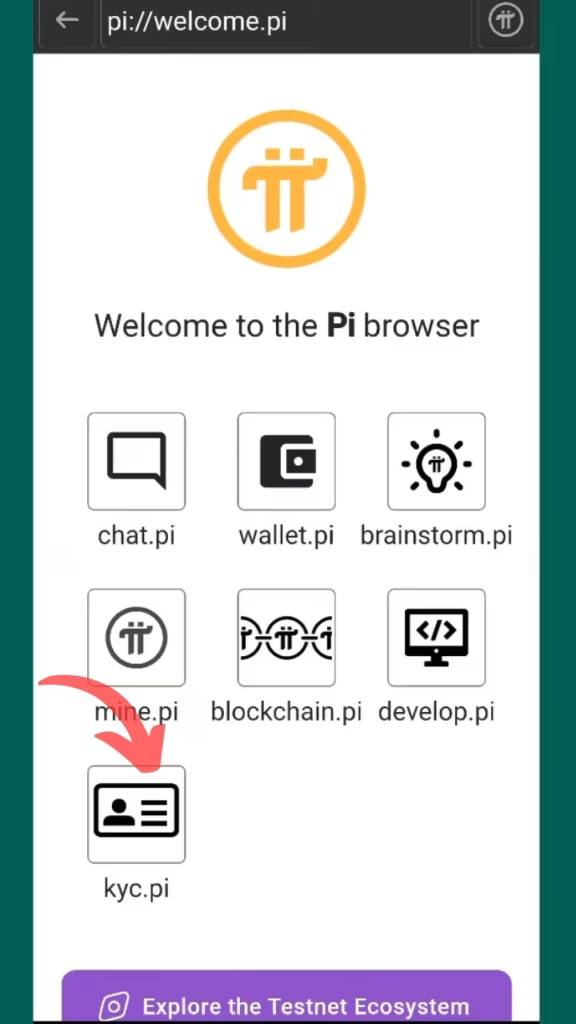
First, go to your Pi Mainnet checklist and navigate to Step 7 to submit your KYC application.Next, tap on the purple-looking box and proceed to the next step.
You’ll be automatically taken to the Pi Browser. Just click on “kyc.pi,” and a new window will pop up. In this window, you’ll need to enter your passphrase to confirm your identity. This step is important to verify that you are the real owner of your account.
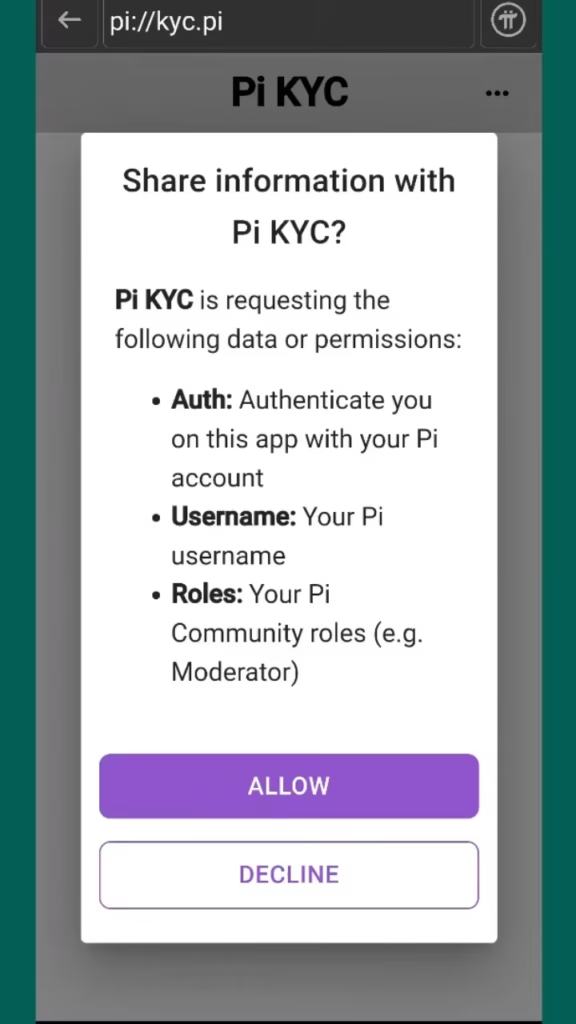
A new window will pop up asking you to share some information with KYC. It will request your authentication username and roles. To move forward, just click on “Allow” to give the necessary permissions.
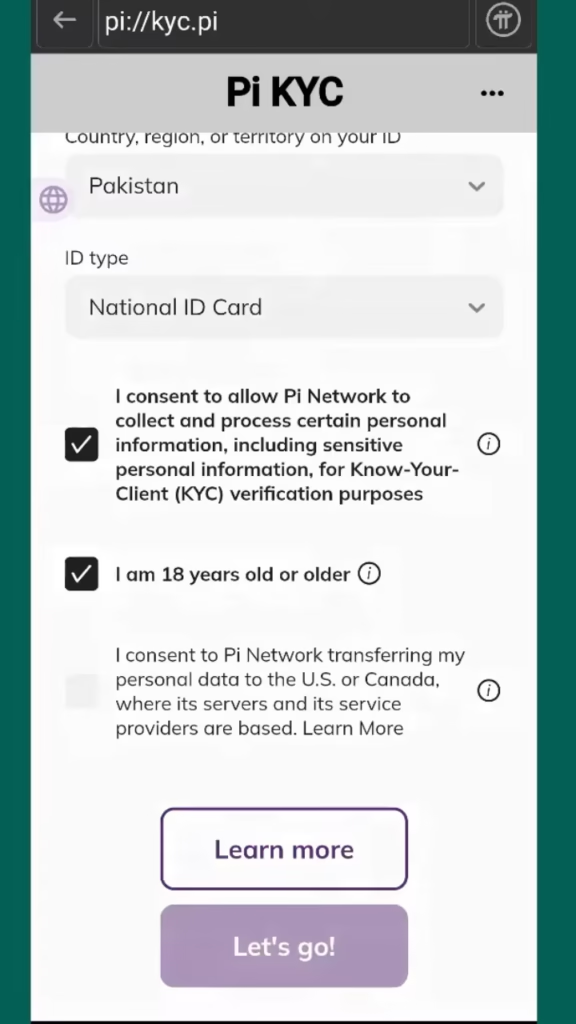
Next, you’ll need to enter your city, region, and ID. You’ll also allow Pi to collect and process your personal information. Additionally, you’ll confirm that you’re over 18 and agree to let Pi share your data with its servers and service providers in the US and Canada.
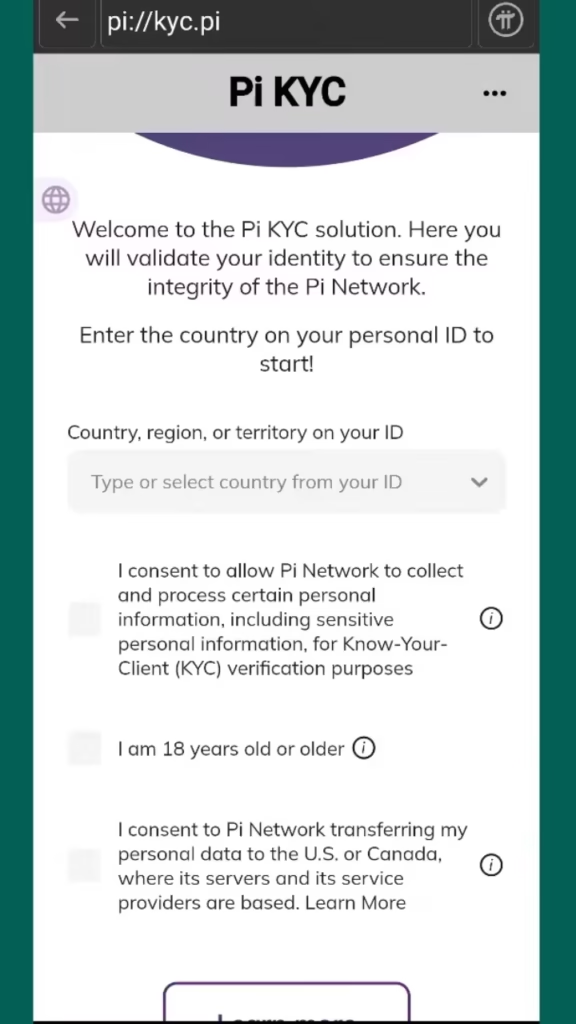
Then you click on lets Go
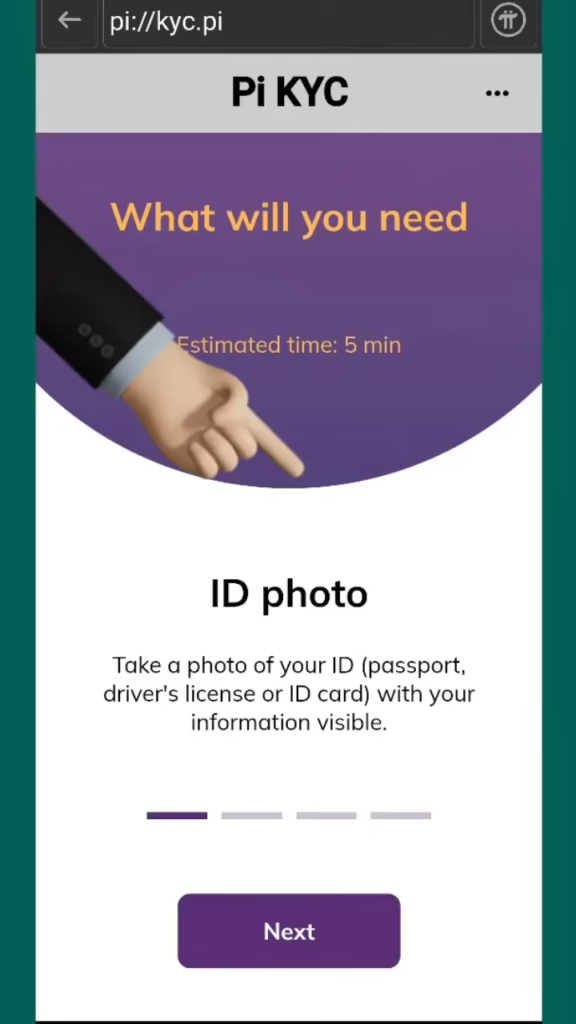
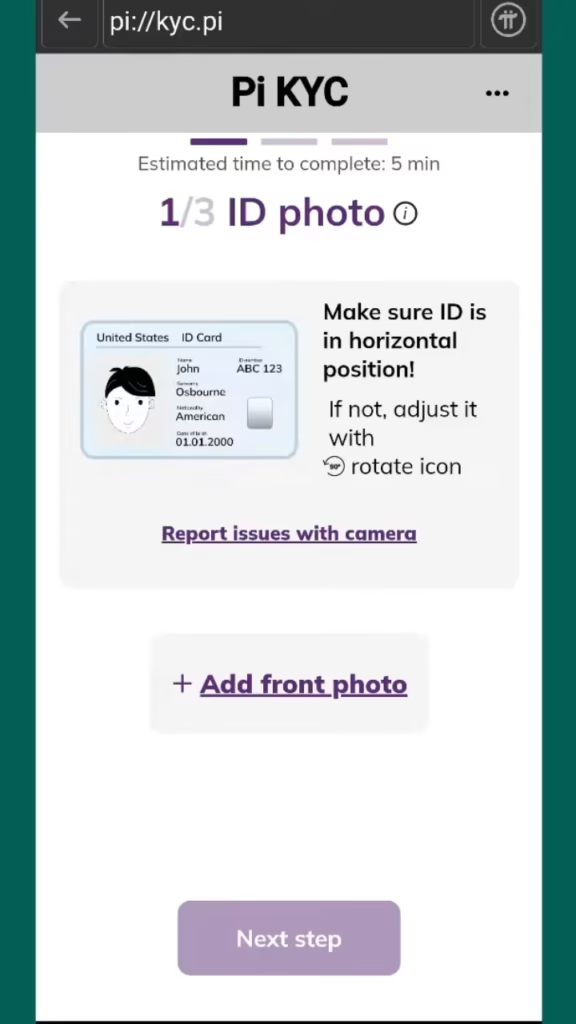
In this step, the Pi app will ask you to upload a photo of your ID (passport, driver’s license, or ID card). Make sure your information is clearly visible in the photo.
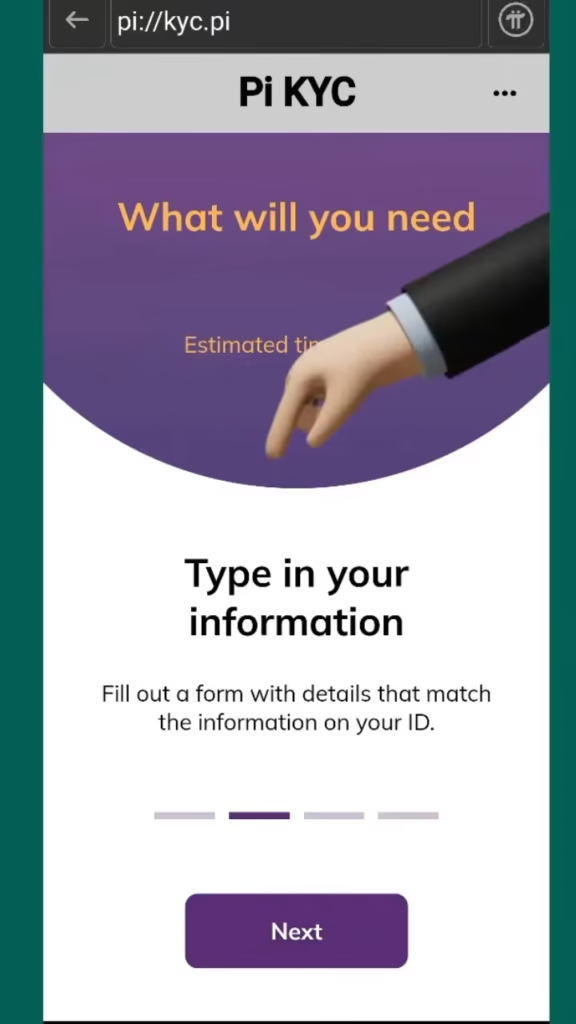
Next, Pi will ask you to enter information that matches the details on your ID card. Make sure the information is accurate to avoid any issues with the verification process.
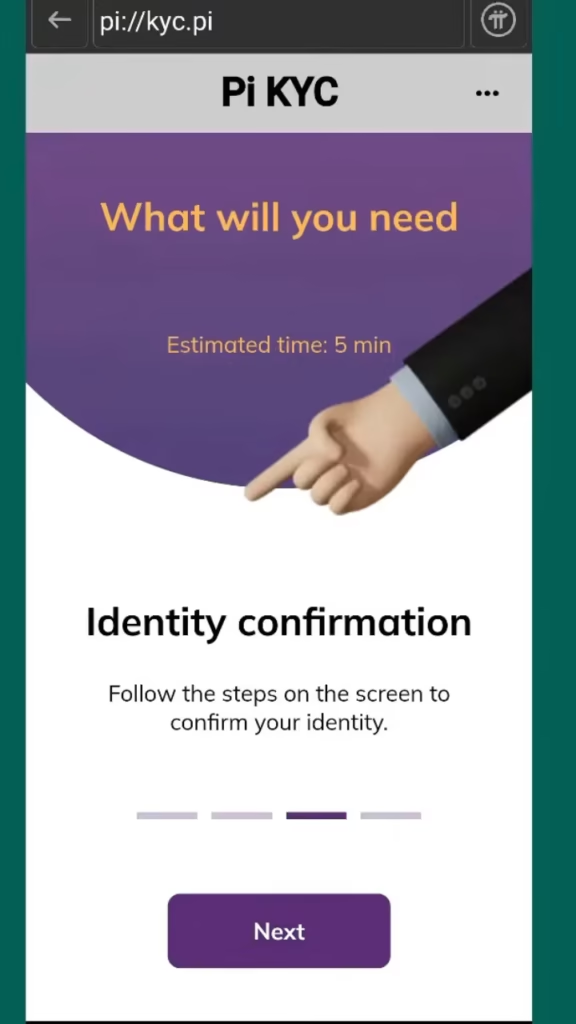
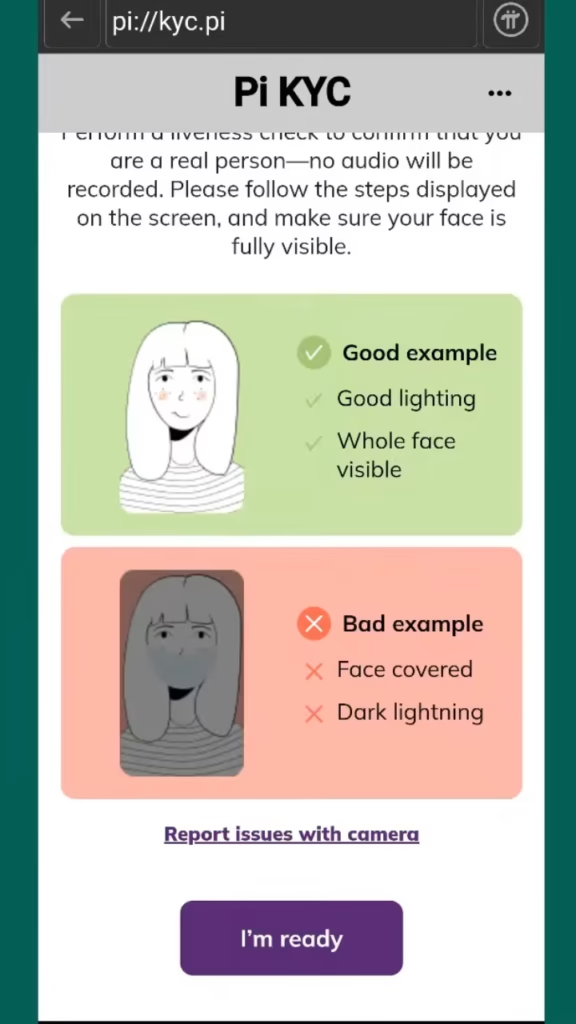
Next, an identity confirmation screen will appear to verify your facial identity. You’ll need to take a selfie to match with the photo on your ID. Make sure the lighting is good and your face is clearly visible.
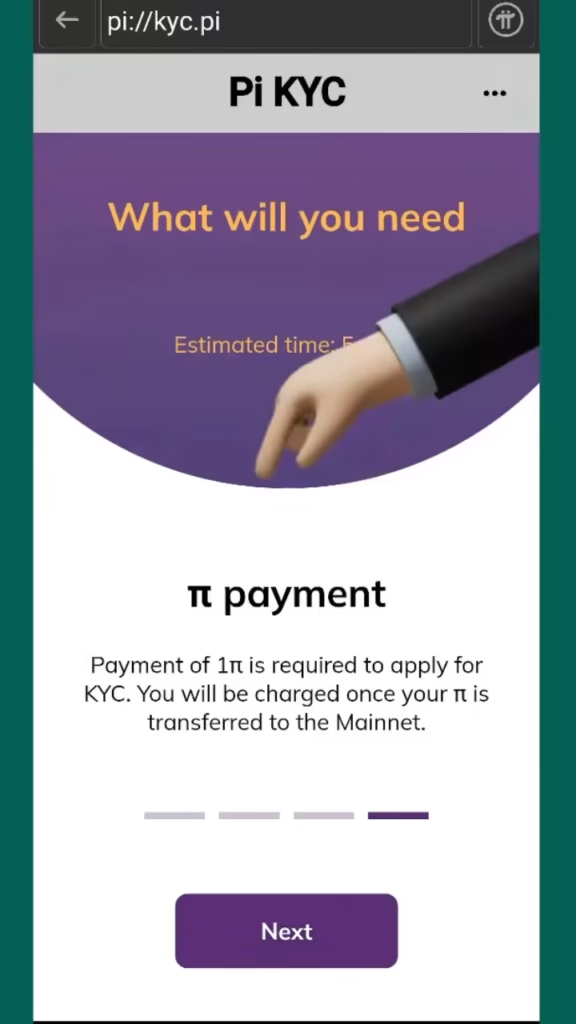
In the next step, you’ll need to pay 1 Pi to apply for KYC. Don’t worry, this charge will only be applied once your Pi is transferred to the mainnet.
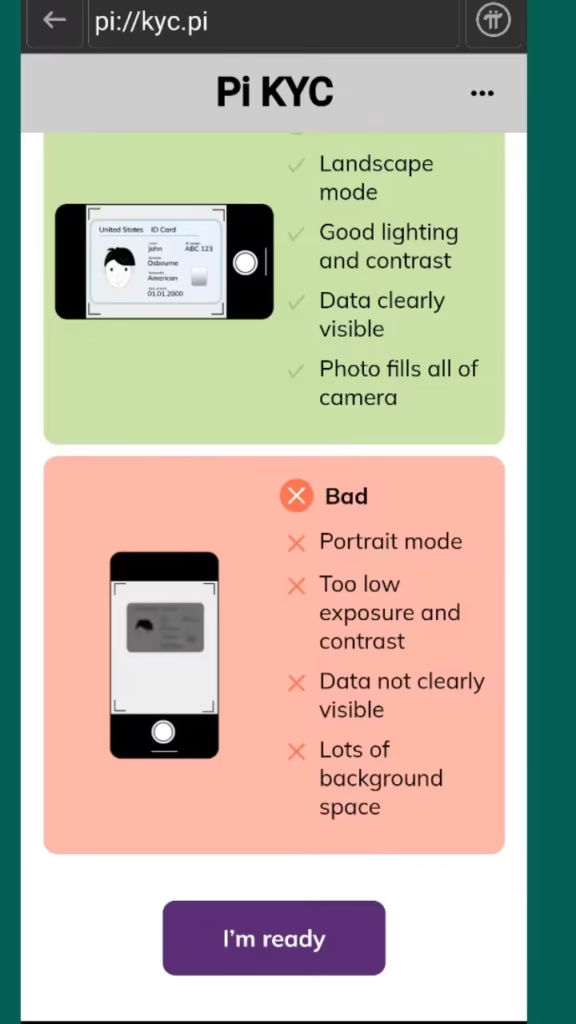
The next step is ID picture verification. Make sure to take a photo of your ID in landscape mode, with good lighting and clear contrast. The details on your ID should be easily visible, and the photo should fill the entire camera frame.
The next step is to use your camera to capture a photo of your ID card. Make sure the ID is positioned horizontally for proper alignment and clarity.
For successful face recognition during Pi Network’s KYC, make sure you have good lighting with no shadows on your face. Keep your face centered and straight in front of the camera. Avoid wearing accessories like glasses or hats, and use a neutral expression. Choose a simple, uncluttered background and make sure your camera is high-resolution and positioned at eye level. Stay still and carefully follow the app’s instructions. A stable internet connection will help the process go smoothly. If your first attempt doesn’t work, try again and keep these tips in mind for clearer results.
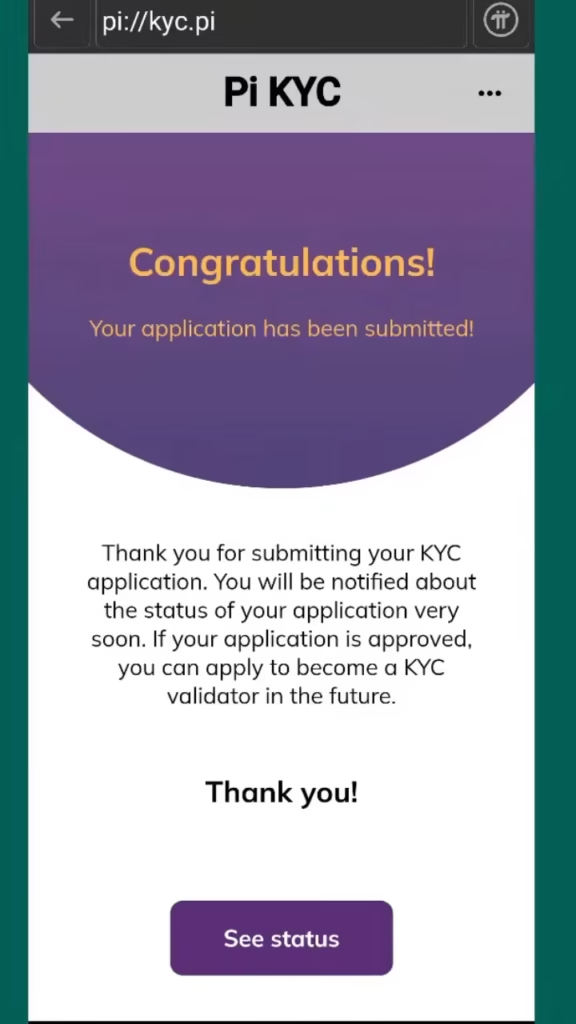
Once you complete this step, a congratulations message will appear on the screen saying that your application has been submitted. After a short while, you will be notified about the status of your application. Stay tuned for updates!
Next, click on “See Status,” and a new window will appear showing your KYC status. It will display “Review in Progress,” indicating that your application is being processed.

Now, go back to your mainnet checklist, and you’ll notice that your purple box has turned green. This means you’ve successfully completed Step 7 and can move on to the next step. By following these instructions, you’ve completed Step 7.
I hope this blog was really helpful to you. Please feel free to leave a comment and let me know your thoughts!