How to Complete Pi Network Mainnet Checklist Step 3
Pi Invitation Code: iamhassaan60
Share this Blog
In this blog, I will explain, step by step, how to complete Step 3 of the Pi Mainnet Checklist. This step is about confirming your wallet address or proving that you own your wallet.

In Step 2, I showed you how to create a wallet on the Pi Network. Now, to move ahead, click on the purple box that says “Confirm Your Pi Wallet” and follow the instructions.

In this step, you need to enter your passphrase to open your wallet. This also ensures that your Mainnet balance will be sent to this wallet. Just type your passphrase into the given box and click Confirm Your Wallet to continue.

After finishing the previous step, a new window will pop up with the message “Welcome to the Pi Testnet Wallet.” Remember, the Testnet Wallet uses Test Pi, which isn’t real and has no actual value. It’s only for testing transactions on the Pi Testnet.
Just click “Continue” to move on to the next step.
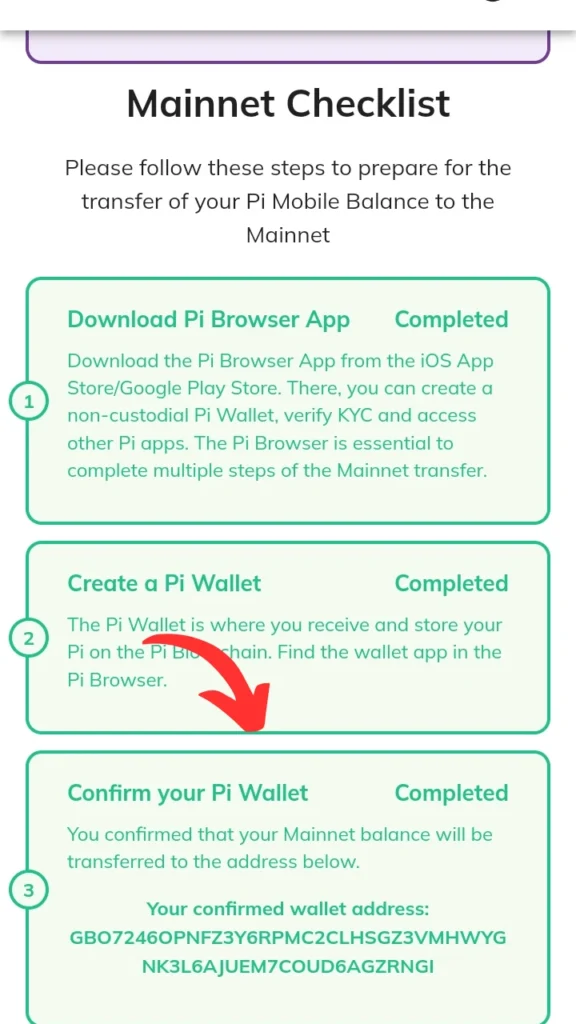
Now, return to the Pi Mainnet Checklist. You’ll see that the purple box has changed to green. This means you’ve successfully completed this step. By following these steps, you’ve finished Step 3!