How to Complete Pi Network Mainnet Checklist Step 4
Pi Invitation Code: iamhassaan60
Share this Blog
In this blog, I will explain how to complete Step 4 of the Pi Network Mainnet Checklist in a simple and easy way. By the end, you will know everything you need to finish this important step successfully.
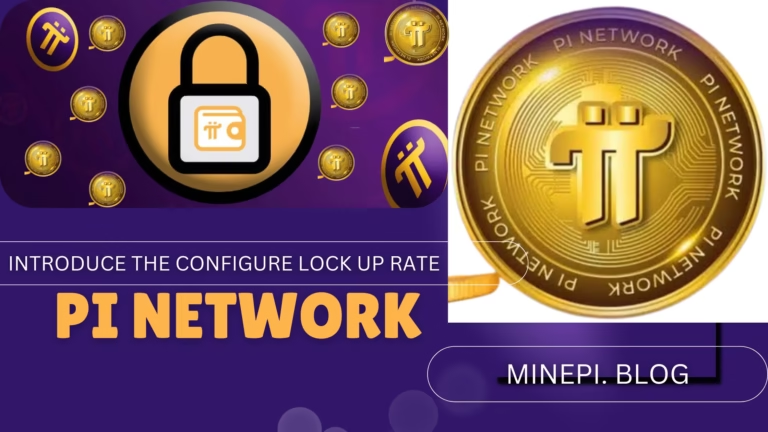
What is Configure lock up rate
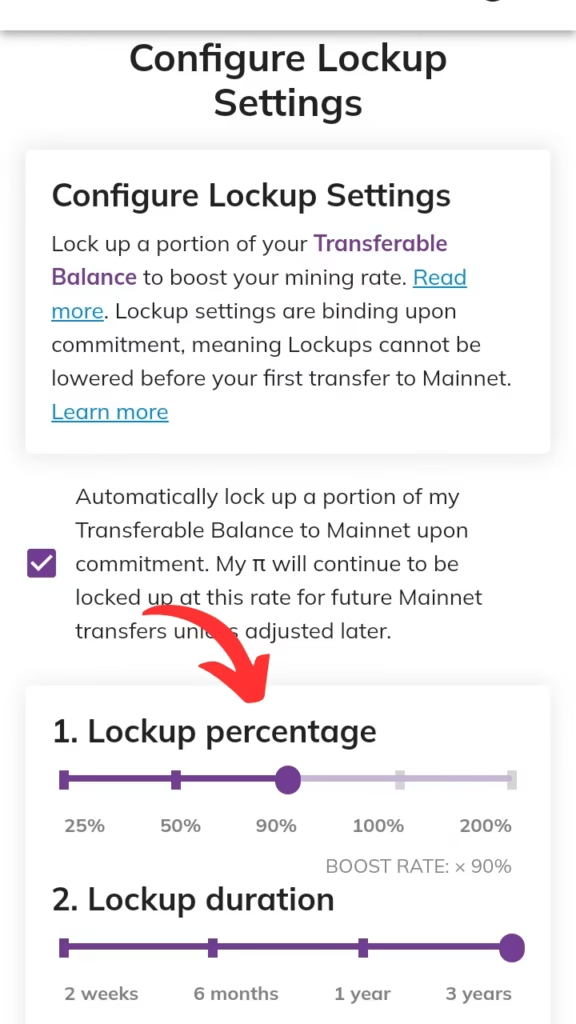
Before starting Step 4 of the Pi Network Mainnet Checklist, it’s important to understand what “Configure Lockup Rate” means and how it works. In the Pi Network, the “lockup rate” is the percentage of your Pi balance that you decide to lock for a certain amount of time.
Locking your Pi means you choose not to use a part of it for that time. When you lock up your Pi, it helps you mine faster and get better rewards.
The more Pi you lock and the longer you lock it, the higher your mining rewards will be.
If you lock less Pi or for a shorter time, your rewards will be lower. So, the more Pi you lock and for a longer time, the bigger your reward.
To start, click on the “Commit Lockup Configuration” option in the Pi Network app. This will take you to the part where you can set the lockup rate for your Pi balance. Make sure you fully understand the lockup rate and how it will impact your rewards before moving forward.

In the next window, you will see a short explanation of how the lockup rate works. Read through the information to understand how locking your Pi balance will impact your rewards. Once you understand the process, just check the box to confirm, and then you can move on to the next step.
In this window, you’ll see an important note: The lower your lockup percentage and the shorter the lockup duration, the smaller your mining rewards will be. This means if you lock a smaller portion of your Pi or lock it for a shorter time, your mining rewards will be less than if you lock a larger amount for a longer time.

In this step, you’ll also notice that the higher your lockup percentage and the longer the lockup duration, the higher your mining rate will be. By locking a larger portion of your Pi and for a longer time, you can greatly boost your mining rewards.
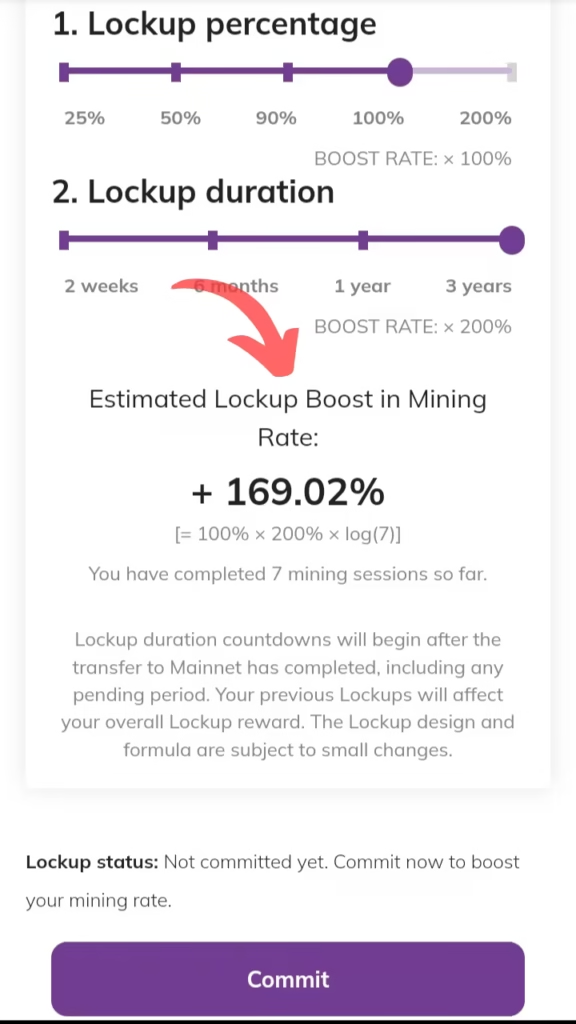
It’s important to choose your lockup percentage and duration carefully because once you make your decision, it cannot be undone. So, take your time to think about how your choices will affect your mining rewards before confirming your selection.
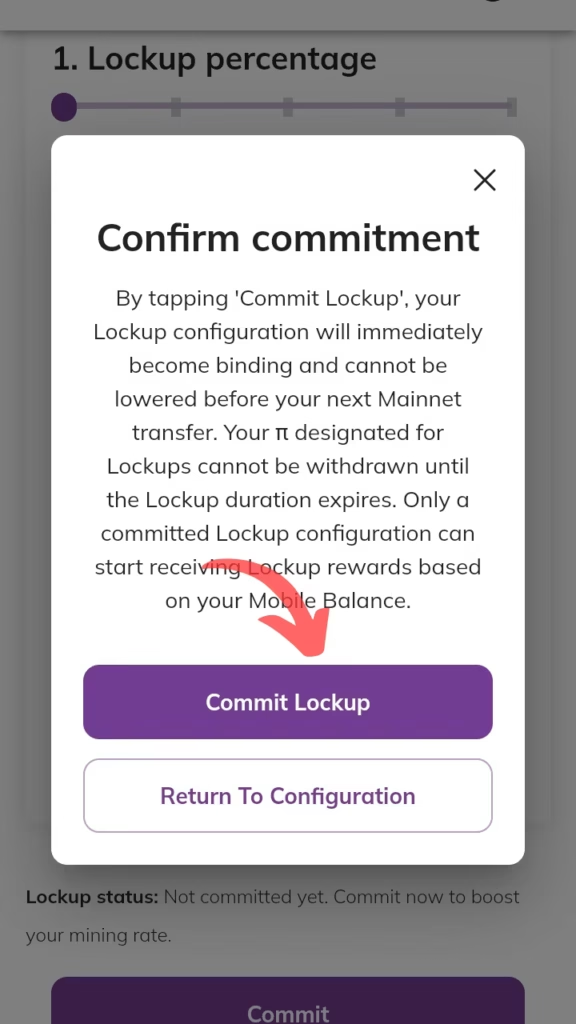
Once you’ve carefully chosen your lockup percentage and duration, just click the “Commit Lockup” button to finalize your decision. This will confirm your lockup settings, and your Pi will be locked based on what you’ve selected.
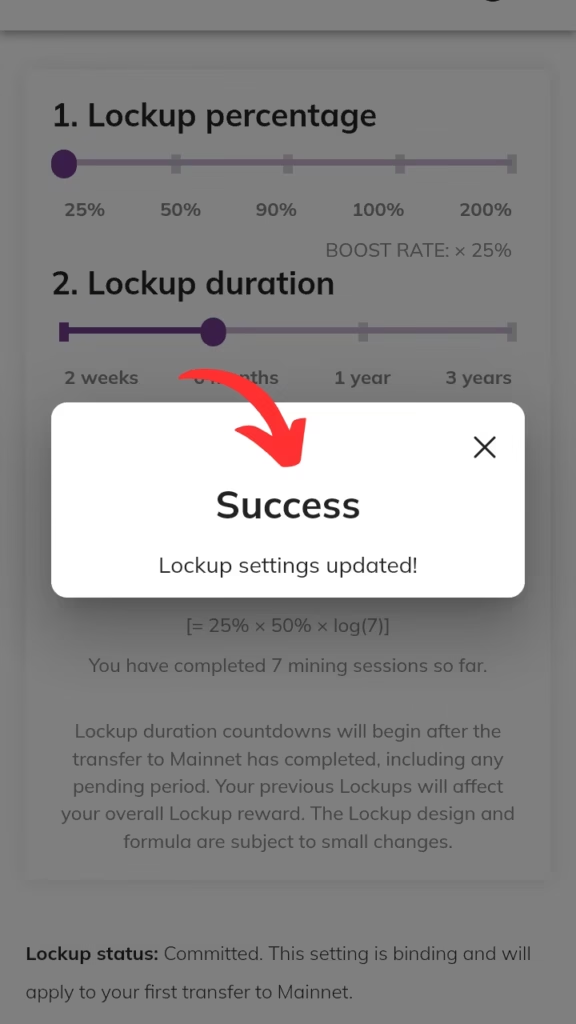
After you click “Commit Lockup,” your lockup rate configuration will be successfully completed. This means your Pi balance is now locked based on the percentage and duration you chose, and you’ll begin receiving the mining rewards that match your selection.
Once you’ve successfully completed the lockup configuration, go back to your Mainnet Checklist. You’ll see that Step 4, which is purple, will turn green, showing that you’ve completed this step. Congratulations on finishing Step 4 of the Pi Network Mainnet Checklist!
I hope this blog has made the process easier for you.