How to Fix (KYC) Slot Not Available on Pi Network
Pi Invitation Code: iamhassaan60
Share this Blog
Many people are facing the problem of “KYC Slot Not Available” on Pi Network. This can happen for different reasons like high demand or technical problems. In this blog, I will show you how to fix this issue and explain how to manually request a KYC application on Pi Network. Whether you’re having trouble finding a slot or need help with the process, this easy guide will help you solve the problem quickly.
When you try to submit your KYC application through the Pi Network app, you might be taken to the Pi browser. When you click the KYC.pi link, a message pops up saying, “Thanks for your interest in Pi KYC verification. Slots are not available at this time. Stay tuned, you will receive an invitation as soon as one becomes available.” This can be really frustrating for users who don’t know how to fix it. Many people wait for an invitation that never comes, often because of technical issues or confusion. The main reason for this problem is that users don’t fully understand the Pi Network system, which leaves them unsure about what to do next.
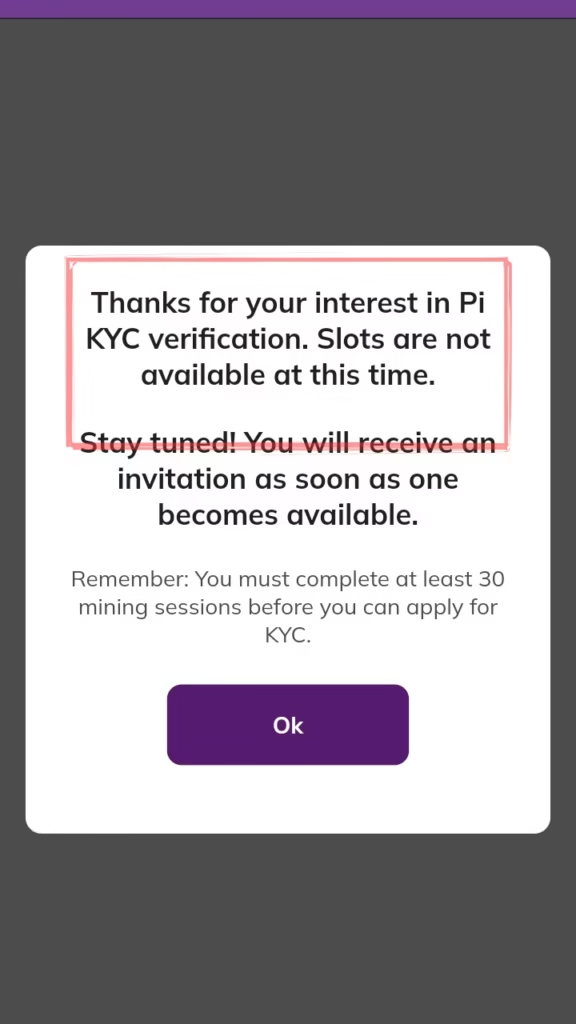
Before you can apply for KYC on Pi Network, you must complete at least 30 mining sessions. This requirement makes sure that users are actively involved in the network and helps keep the KYC process secure. If you haven’t finished the required sessions yet, you’ll need to mine regularly until you reach the required number before you can apply for KYC.
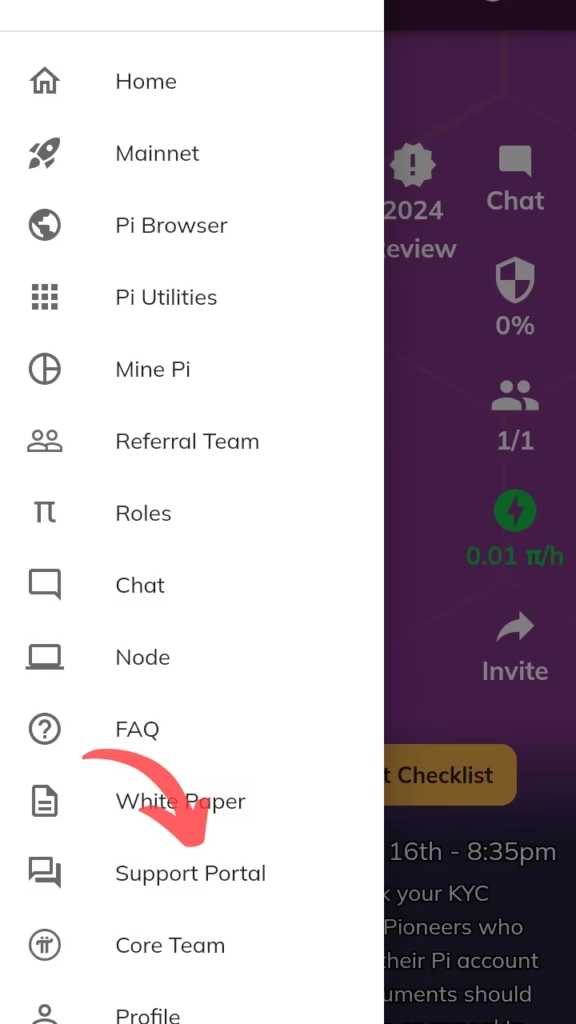
After seeing the pop-up message, just click “OK” and go back to your Pi Network mining app. Then, tap the menu button and choose the “Support Portal” option. This will take you to the support section, where you can get help with your KYC application or report any problems you’re having.
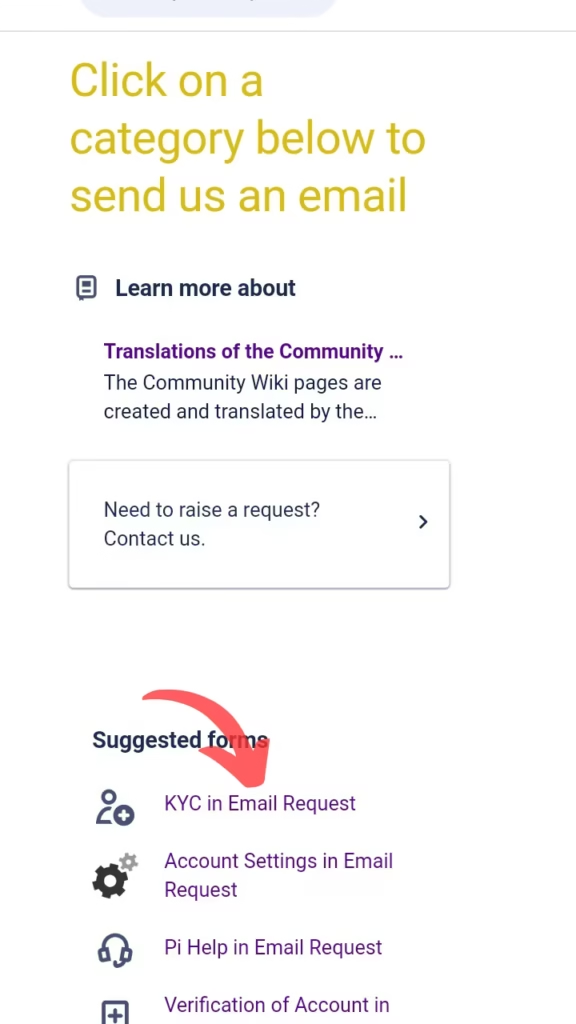
In the support window, you’ll see different options to get help from the Pi Network technical team. To address your KYC issue, click on the “KYC via Email Request” option. This will let you send your question directly to the Pi Network team and ask for help with your KYC application.
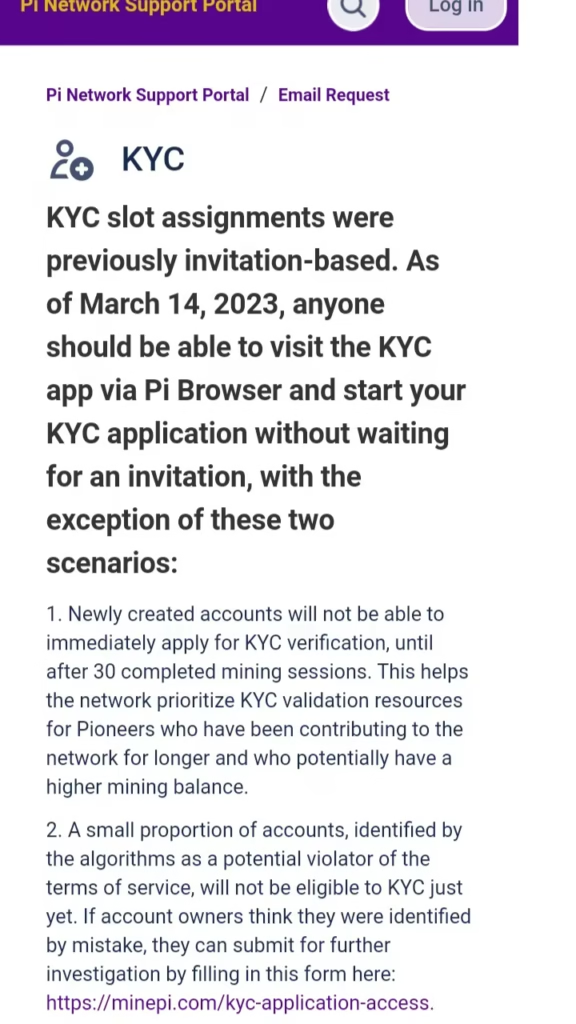
A new window will open with important information from Pi Network about the KYC process. It explains that KYC slots used to be by invitation only, but since March 14, 2023, anyone can go to the KYC app through the Pi Browser to start the application without an invitation. However, there are two exceptions:
New Accounts: New accounts can’t apply for KYC until they’ve completed 30 mining sessions. This is to make sure the network gives priority to users who have been mining longer and may have a higher balance.
Account Issues: A small number of accounts that are flagged by algorithms as potential violators of Pi Network’s rules cannot apply for KYC. If you think your account was flagged by mistake, you can ask for more help.
The message also reminds you not to send your ID card by email or try to check your KYC application outside of the KYC app. It’s important not to self-report or use any method other than the official form to solve any issues.
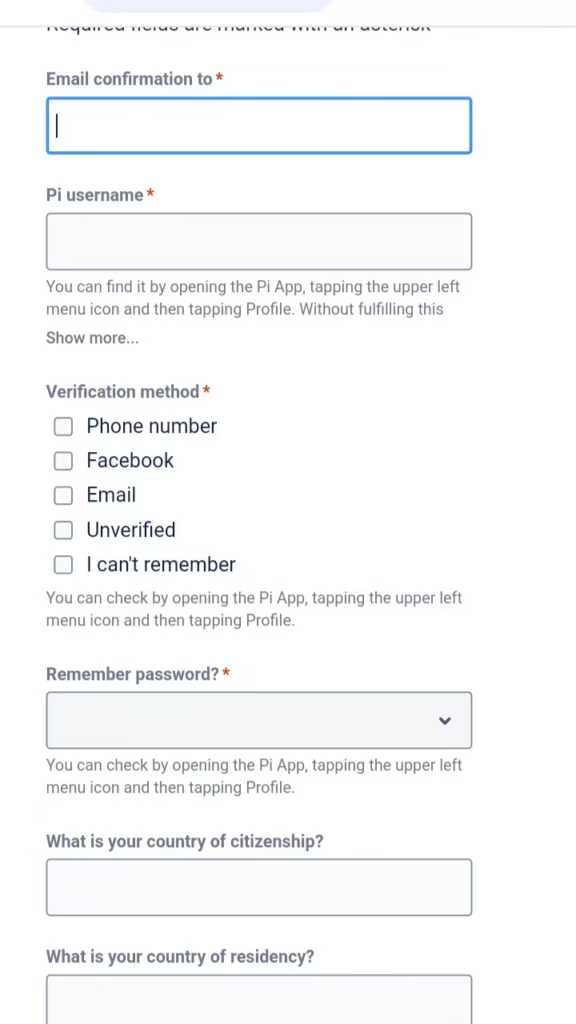
Next, you’ll be asked to enter your email and Pi Network username. After that, you’ll need to choose your verification method—phone number, Facebook, or email. If you’re already verified, click the appropriate option. If you’re not verified, select “Unverified.”
Then, you’ll be asked to enter your Pi Network password. After that, select your country and the country where you live. This ensures the KYC process matches your location and account details correctly.
After entering your country and residency details, you’ll see several questions related to KYC issues. One of the questions will ask, “When did you apply for KYC?” It’s important to read this carefully and choose the correct option based on when you applied. Once you’ve selected the right answer, click “Submit.” This will send your request for review, and the Pi Network team will check your KYC status.
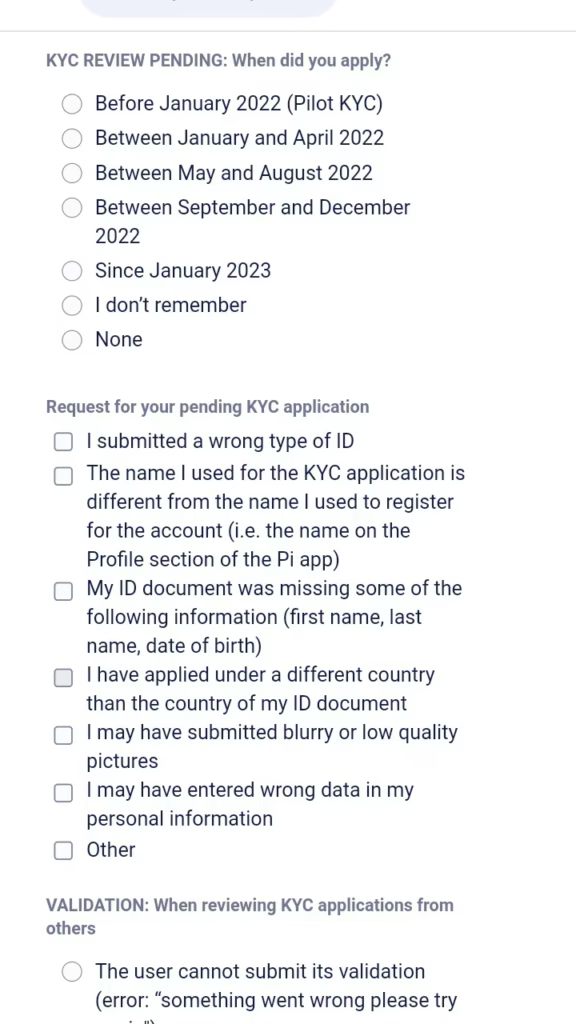
In addition to selecting the correct options, you’ll also see a “KYC Description” box. Here, you can briefly explain the issue you’re having with your KYC application. Make sure to be clear and to the point, as this will help the Pi Network support team understand your problem and assist you more effectively.
There is also an option where you can drag and drop an image of your issue. This can be extremely helpful for the Pi Network support team, as it allows them to visually understand the problem you’re facing. Uploading a screenshot or image that illustrates the issue will make it easier for them to provide the right assistance. Once you’ve added the image, you can submit the request for review.
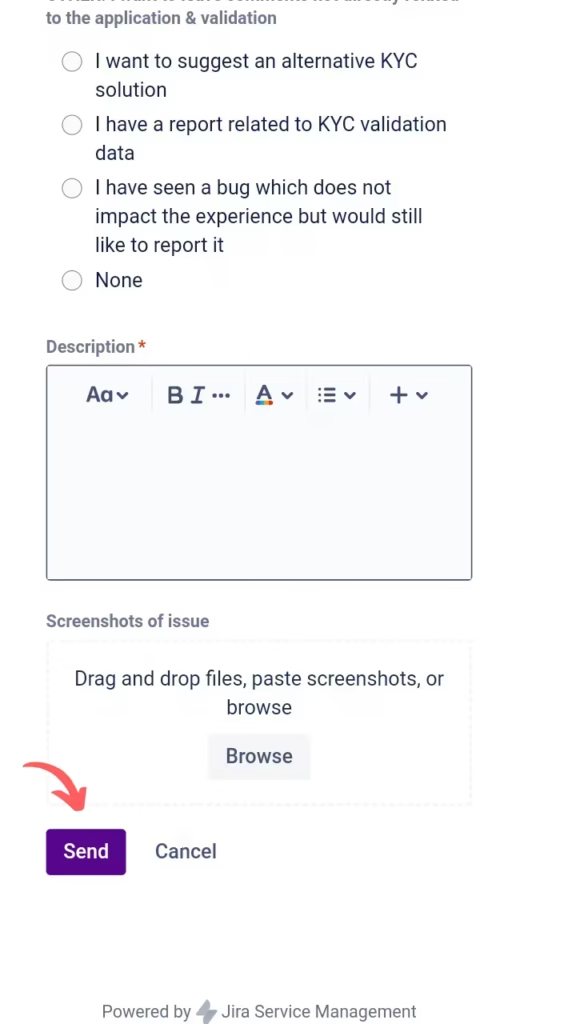
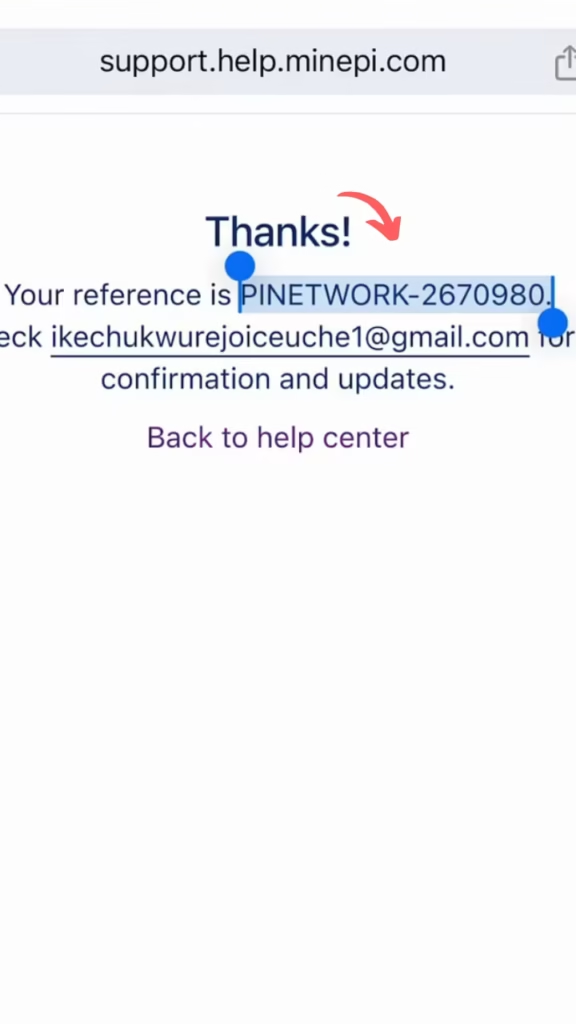
After filling out the required details and attaching any relevant images, click “Submit.” A thank you message will appear, confirming that your request has been received. This message will include a reference ticket number for your query and the Gmail address where you’ll get updates on the status of your request. Make sure to check your email for any further instructions or responses from the Pi Network support team.
You can expect to receive an email from the Pi Core Team within a week, and hopefully, your issue will be resolved. By following these steps, you should have successfully submitted your query for review. I hope this blog has helped solve your problem. If you found this guide useful, please leave a comment below and share this blog post with others who might find it helpful.